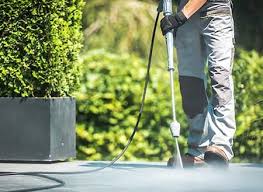
Hey there, fellow homeowner! If you’ve been staring at those grimy siding panels, that moss-covered walkway, or that oil-stained driveway for too long, it might be time to break out the pressure washer. As someone who’s seen the dramatic before-and-after transformations that a good pressure washing can deliver, I’m excited to share this comprehensive guide to help you tackle this satisfying weekend project. Shark Power Washing has been delivering amazing pressure washing services and results here in the Wilmington area for nearly 20 years. We love this community and love to see it shine. We, of course, would love to serve you with professional residential pressure washing or commercial pressure washing services; but in case you just really want to do it yourself, here’s a guide on how to best approach a DIY pressure washing project.
Living in Wilmington’s humid coastal climate means our homes take a beating from salt air, pollen, mildew, and all sorts of environmental factors that leave our exteriors looking tired and weathered. The good news? With the right approach, you can restore that fresh, clean look yourself – and the results can be absolutely stunning.
Why Pressure Washing Matters More Than You Think
Before we dive into the nuts and bolts, let’s talk about why pressure washing is more than just a cosmetic touch-up:
- Prevents Damage: That green stuff creeping up your siding isn’t just unsightly – it’s actually damaging the surface over time. Algae, mold, and mildew can deteriorate vinyl siding, wood, and even concrete if left unchecked.
- Maintains Property Value: First impressions matter! A clean exterior can increase your home’s curb appeal by up to 5-10% according to some real estate experts. That’s thousands of dollars in value from a weekend project.
- Healthier Living Environment: Those spores from mold and mildew aren’t just on your house – they’re in the air you breathe when you’re enjoying your porch or yard. Removing them creates a healthier outdoor living space.
- Prepares Surfaces for Maintenance: Planning to repaint or reseal? Pressure washing is the essential first step for proper adhesion and long-lasting results.
I remember my neighbor John who had been battling recurring mildew on his north-facing siding for years. After a thorough pressure washing and applying a preventative treatment, he hasn’t had issues for a couple years now. That’s the kind of lasting impact we’re talking about!

Pressure Washing Equipment Essentials: Beyond the Basics
Let’s talk about what you’ll need to get started. While the original article covered the fundamentals, here’s a more detailed breakdown with some practical advice I’ve learned from experience:
Pressure Washer Selection
When choosing between electric and gas models, consider these real-world factors:
Electric Pressure Washers (1,500-2,000 PSI)
- Perfect for: Vinyl siding, wooden decks, outdoor furniture, vehicles
- Pros: Lightweight (usually under 35 lbs), quieter (won’t annoy neighbors), minimal maintenance
- Cons: Requires outlet access, less powerful for stubborn stains
- Cost: $100-300 for a quality homeowner model
- My recommendation: The Sun Joe SPX3000 offers excellent value for typical home use
Gas Pressure Washers (2,500-4,000 PSI)
- Perfect for: Concrete driveways, brick, stubborn stains, large areas
- Pros: More powerful, no cord restrictions, faster cleaning
- Cons: Louder, heavier (50+ lbs), requires fuel and more maintenance
- Cost: $300-700 for a reliable unit
- My recommendation: The Simpson MegaShot consistently delivers decent results
Essential Accessories Worth Investing In
Beyond the pressure washer itself, these accessories can make your job significantly easier:
- Surface Cleaner Attachment ($40-100): This disk-shaped tool connects to your wand and uses rotating spray jets to clean concrete 4x faster than a standard nozzle. Trust me, once you try it on your driveway, you’ll never go back to the regular nozzle.
- Extension Wand ($30-70): Reach high siding and second-story surfaces safely from the ground. I recommend a telescoping model that extends to at least 12 feet.
- Foam Cannon ($20-50): Applies thick, clinging soap that boosts cleaning power dramatically. This is particularly useful for siding and vehicles.
- Specialized Nozzles: Most washers come with these, but know what each color does:
- Red (0°): Extremely concentrated stream for stubborn spots (use with caution!)
- Yellow (15°): Heavy-duty cleaning for concrete and tough stains
- Green (25°): General purpose for most surfaces
- White (40°): Gentle spray for delicate surfaces
- Black (soap): Low-pressure nozzle for applying detergent
- Gutter Cleaning Attachment ($20-40): A curved wand that helps you blast leaves and debris from gutters without climbing a ladder.
Personal Protective Equipment (PPE): Safety First!
The pressure from these machines can penetrate skin and cause serious injury. I’ve seen too many weekend warriors end up with injuries that could have been easily prevented. Always wear:
- Protective Eyewear: Not just regular sunglasses – get actual safety goggles that seal around your eyes
- Closed-toe, Non-slip Footwear: Rubber boots with good traction are ideal
- Heavy-duty Waterproof Gloves: Provides better grip and protection
- Hearing Protection: Especially important with gas models (85+ decibels)
- Long Pants and Sleeves: To protect from debris kickback and detergent splash
Preparing Your Workspace: The Step Most People Skip
Before you start any pressure washing project, take these preparatory steps that can make a huge difference:
- Check the Weather Forecast: Aim for overcast days between 60-80°F. Direct sunlight can cause cleaning solutions to dry too quickly and leave streaks. Avoid windy days which can blow spray back onto you.
- Protect Landscaping: Pressure washing detergents can harm plants. Pre-soak surrounding vegetation with water to dilute any overspray, or cover delicate plants with plastic sheeting.
- Turn Off Outdoor Electricity: Cover outdoor outlets and lighting fixtures with plastic and tape. Water and electricity don’t mix!
- Close All Windows and Doors: Seems obvious, but we’ve all been there – double-check everything is sealed tight.
- Remove Obstacles: Clear the area of furniture, grills, potted plants, and anything else that might get damaged or trip you.
- Pre-treat Stubborn Stains: For oil spots on concrete or particularly grimy areas, apply an appropriate cleaner and let it sit for 15-20 minutes before pressure washing.
- Test in an Inconspicuous Area: Always start with a small, hidden test area to ensure your pressure/nozzle selection won’t damage the surface.
Surface-Specific Techniques
Different surfaces require different approaches. Here’s how to tackle the most common areas around your home:
Vinyl Siding
Vinyl siding is durable but can be damaged by excessive pressure. Here’s my method for a streak-free clean:
- Start with a Pre-Rinse: Use the 40° white nozzle to wet the siding from bottom to top. This prevents the cleaning solution from creating streaks.
- Apply Cleaning Solution: Switch to the soap nozzle and apply a vinyl-safe cleaner. For stubborn mildew areas, use a solution of 30% white vinegar and 70% water as a natural alternative to harsh chemicals.
- Let it Dwell: Allow the solution to work for 5-10 minutes, but don’t let it dry completely.
- Scrub Problem Areas: For stubborn spots, use a soft-bristled extension brush before rinsing.
- Rinse Properly: Switch back to the 25° or 40° nozzle and rinse from top to bottom, working in 6-8 foot sections and overlapping slightly.
- Maintain Safe Distance: Keep the nozzle at least 12-18 inches from the siding and spray at a slight downward angle to avoid forcing water behind the panels.
- Follow a Pattern: Work from one end of the house to the other in a methodical pattern, completing one section before moving to the next.
Pro Tip: For two-story homes, work on the upper level first, then the lower level. This prevents dirty water from running down onto already-cleaned areas.
Concrete Driveways and Walkways
Concrete can handle more pressure, but technique still matters:
- Remove Debris: Sweep or blow away loose dirt, leaves, and debris first.
- Pre-treat Oil Stains: For oil spots, apply a concrete degreaser and let it sit for 15-20 minutes. You can also use dish soap mixed with baking soda as a paste for smaller spots.
- Use a Surface Cleaner: Rather than a standard nozzle, a surface cleaner attachment will clean more evenly and prevent “zebra stripes” from inconsistent distances.
- Work in Sections: Clean in manageable 4×4 foot sections, slightly overlapping each pass.
- Maintain Consistent Motion: Keep the surface cleaner moving at a steady pace – too slow can etch the concrete, too fast won’t clean effectively.
- Angle at Tough Spots: For stubborn stains, hover slightly longer or use the 15° nozzle at a 45-degree angle from about 8-10 inches away.
- Final Rinse: Do a final light rinse with the 40° nozzle to remove any remaining detergent or loosened grime.
- Allow Proper Drying Time: Keep vehicles and furniture off the concrete for at least 24 hours if you plan to apply any sealant afterward.
Pro Tip: For extremely dirty concrete, consider doing two passes – one perpendicular to the other – for the most thorough cleaning.
Wooden Decks and Docks
Wood requires extra care to avoid damage:
- Use Lower Pressure: Stick with 1,500-2,000 PSI maximum for wood surfaces.
- Choose the Right Nozzle: The 40° white nozzle is safest for wood.
- Go With the Grain: Always spray in the direction of the wood grain, never against it.
- Keep Moving: Don’t linger in one spot, as this can cause furring or etching of the wood.
- Maintain Distance: Keep the nozzle 12-18 inches from the surface.
- Clean Between Boards: For the gaps between deck boards, use a rotating zero-degree nozzle attachment specifically designed for this purpose.
- Allow Full Drying Time: Let the deck dry completely (usually 48 hours) before applying any stain or sealer.
Pro Tip: If your deck is heavily stained or has an old finish, consider using a deck cleaner specifically formulated for wood before pressure washing.
Brick and Stone
These surfaces are durable but have special considerations:
- Check Mortar Condition: Inspect mortar joints before starting. If they’re crumbling, consider having them repointed before pressure washing.
- Use Medium Pressure: 2,000-2,500 PSI is typically sufficient for brick and stone.
- Test First: Always test in an inconspicuous area, as some older bricks can be more fragile.
- Work Top to Bottom: Start at the top and work your way down in small sections.
- Address Moss and Growth: For green growth, apply a mixture of bleach and water (1:4 ratio) and let sit for 15 minutes before rinsing.
- Maintain Distance: Keep the nozzle 12-18 inches away from the surface.
- Rinse Thoroughly: Ensure all cleaning solution is rinsed away to prevent residue.
Pro Tip: For historic brick homes, consider using a gentler cleaning method or hiring a professional who specializes in historic preservation.
Troubleshooting Common Problems from Pressure Washing
Even with the best preparation, you might encounter some challenges. Here’s how to handle them:
Problem: Streaking on Siding
Solution: This usually happens when soap dries before rinsing. Work in smaller sections and rinse thoroughly from top to bottom. On hot days, keep the entire wall wet while working.
Problem: “Zebra Stripes” on Concrete
Solution: These occur from inconsistent distance or movement. Use a surface cleaner attachment or maintain a consistent height and speed with your spray pattern.
Problem: Pressure Washer Pulsing
Solution: This typically indicates insufficient water supply. Check for kinks in your hose, clean the inlet filter, or try a larger diameter hose.
Problem: Wood Furring Up
Solution: If wood gets a rough, fuzzy texture, you’ve used too much pressure. Sand the affected area when dry and reduce pressure next time. Use a cleaner specifically designed for wood to minimize the need for high pressure.
Problem: Water Getting Behind Siding
Solution: Always spray downward at an angle, never upward or directly into seams. If water intrusion occurs, allow proper drying time and consider using a dehumidifier inside if necessary.
Problem: Detergent Not Dispensing
Solution: Make sure you’re using the soap nozzle (usually black) and that your detergent is properly diluted. Check that the siphon tube isn’t clogged or cracked.
Seasonal Exterior Maintenance Tips
To keep your home looking its best year-round, follow this seasonal pressure washing schedule:
Spring:
- Deep clean all surfaces after winter
- Focus on gutters and downspouts to clear winter debris
- Remove pollen from siding and outdoor furniture
Summer:
- Touch up high-traffic areas like walkways and entryways
- Clean outdoor entertaining spaces before gatherings
- Wash windows and screens
Fall:
- Clear falling leaves from gutters and downspouts
- Clean and seal wooden decks before winter
- Remove summer grime from siding
Winter:
- Spot clean as needed, especially entryways
- Focus on covered areas like porches and patios
- Clean garage floors while cars are out of the way
When to Call the Professionals
While DIY pressure washing can be rewarding, some situations call for professional help:
- Height Concerns: Anything requiring a ladder with a pressure washer can be dangerous
- Delicate Surfaces: Historic homes, stucco, or damaged surfaces
- Roof Cleaning: This requires specialized equipment and training
- Persistent Stains: If you’ve tried everything and stains remain
- Time Constraints: When you need the job done quickly and efficiently
- No Equipment: If purchasing equipment isn’t cost-effective for one-time use
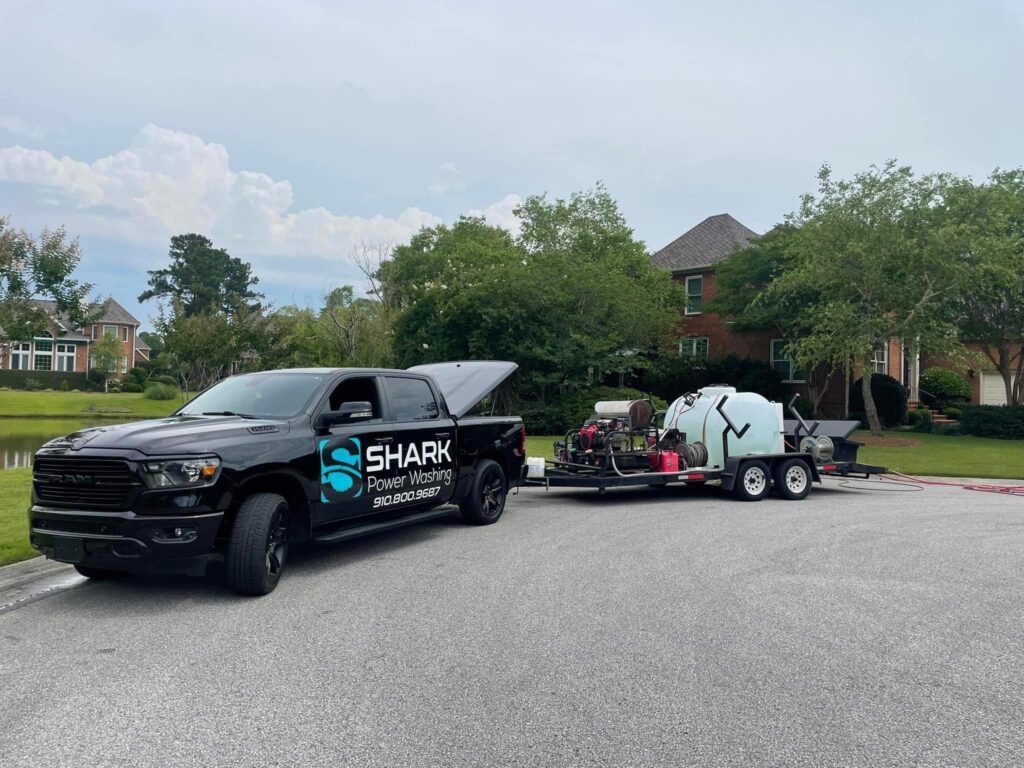
Why Shark Power Washing Might Be Your Best Option
While this guide gives you the know-how to tackle pressure washing yourself, sometimes calling in the pros makes sense. Here’s why Shark Power Washing stands out for homeowners in Wilmington and surrounding areas:
- Commercial-Grade Equipment: Access to professional equipment that delivers better results in less time
- Expertise with Local Conditions: Understanding of Wilmington’s unique climate challenges and how to address salt air, humidity, and coastal grime
- Eco-Friendly Solutions: Using environmentally safe detergents that are effective but won’t harm your landscaping or local waterways
- Comprehensive Services: From siding to roofs, concrete to wood – we handle it all with specialized techniques
- Insurance and Guarantee: Peace of mind knowing we’re fully insured and stand behind their work
- Water Reclamation: Professional services often use water reclamation systems that prevent runoff issues
While I’ve always enjoyed the satisfaction of doing projects myself, there have been times when calling a professional service like Shark Power Washing can save you time, potential damage, and even money when considering equipment purchases. Our free estimates make it easy to compare the DIY vs. professional route for your specific situation.
Final Thoughts: The Power of Pressure
Whether you choose to tackle this project yourself or call in the pros, regular pressure washing is one of the most impactful maintenance tasks you can do for your home. Nothing quite compares to the satisfaction of seeing years of grime disappear before your eyes, revealing the beautiful surfaces underneath.
Remember, pressure washing isn’t just about aesthetics – it’s about protecting your biggest investment. By removing harmful substances before they can cause damage, you’re extending the life of your home’s exterior surfaces and maintaining its value for years to come.
So grab that pressure washer (or pick up the phone to call Shark Power Washing), and get ready to fall in love with your home’s exterior all over again. Your neighbors will be asking what your secret is!